PlanGuru Analytics was designed to provide a collaborative reporting, charting and dash-boarding platform that can be extended to individuals both inside and outside your organization.
For example a CPA may want to work collaborative with multiple clients from a single log-in. Each client will need access to their own data and must be restricted from seeing others information. Similarly a controller or CFO may want to share varying levels of information with different individuals within their organization.
To accomplish these goals PlanGuru Analytics was created with three different types of users, each possessing their own set of permissions.
Subscription Creation
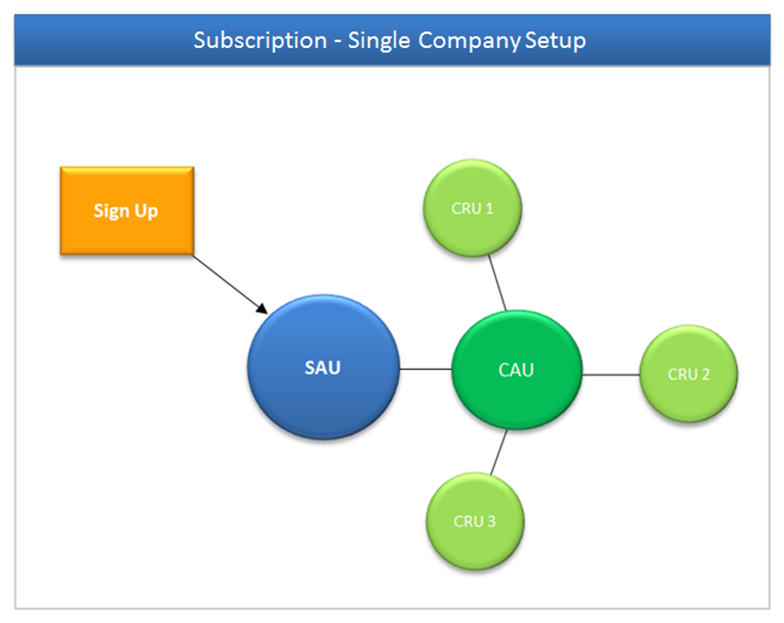
For now let’s focus on the Subscription Administrative User (SAU). The SAU designation is assigned to the individual who creates the account through the “Sign Up” button. All other users you wish to share data with should be added to your subscription.
Adding Users
A newly created subscription will have a single user, the SAU. New users can be added by when you're logged into your PlanGuru Analytics.
1. Navigating to the “Manage Account” menu in the top right hand corner of the page and selecting the “Users” option
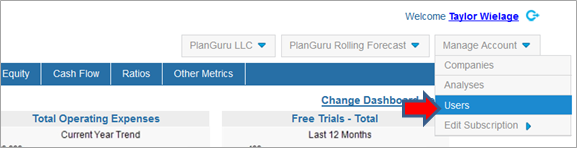
2. Next click the “New User” button

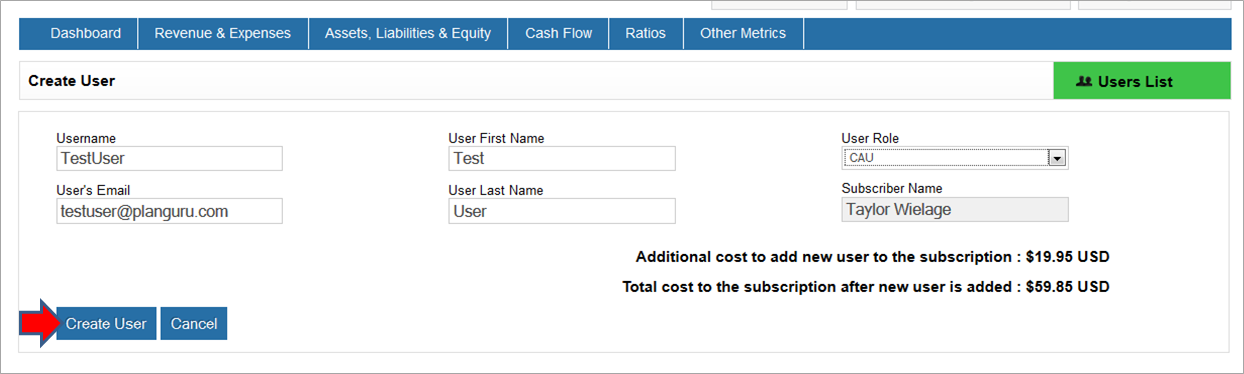
3. Fill out information about the new user:
- Username – This will be the new users login name when signing into PlanGuru Analytics
- User’s E-mail – Provide the users e-mail address
- First Name
- Last Name
- User Role – A user can be added as a “Company Administrative User” (CAU) or a “Company Regular User” (CAU). CAUs will have additional privileges over a regular user.
4. Complete the process by clicking the “Create User” button. This will send an e-mail to the user providing confirmation and temporary log-in credentials
Learn more about User Roles and Permissions
Creating Companies and Analysis Files
Much like the PlanGuru core product, PlanGuru Analytics uses the“Company” & “Analysis” as a way to organize data. Before you can upload any data to PlanGuru Analytics, you must first create a Company and Analysis.
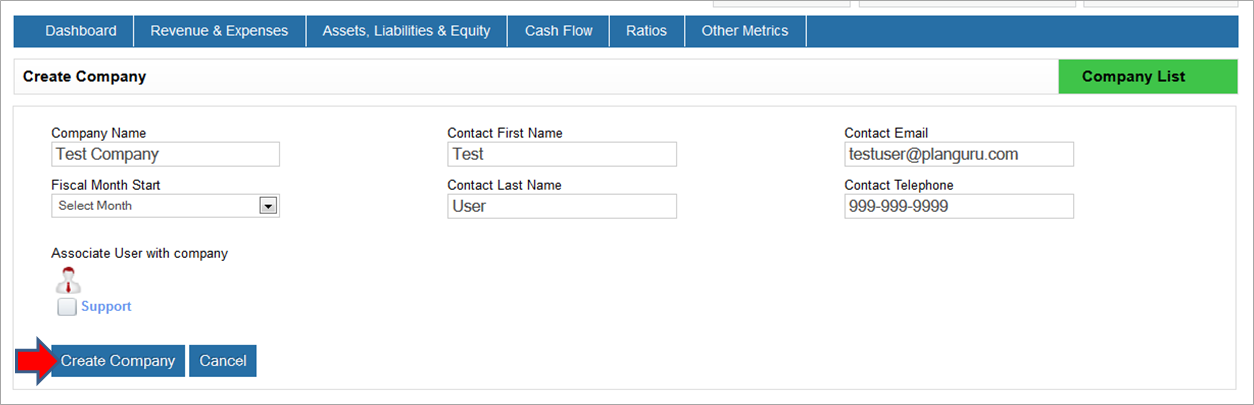
Adding a Company
1. Navigating to the “Manage Account” drop-down menu in the top right hand corner of the page and selecting the “Companies” option.
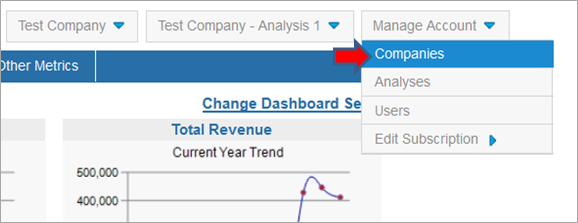
2. Next click the “New Company” button. Next you will be asked to fill out information about the Company.
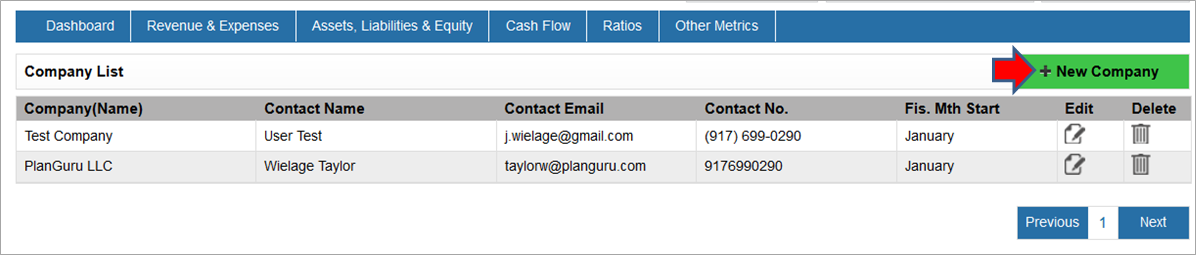
3. Once you’ve filled out the required fields, click the “Create Company” button to add the Company
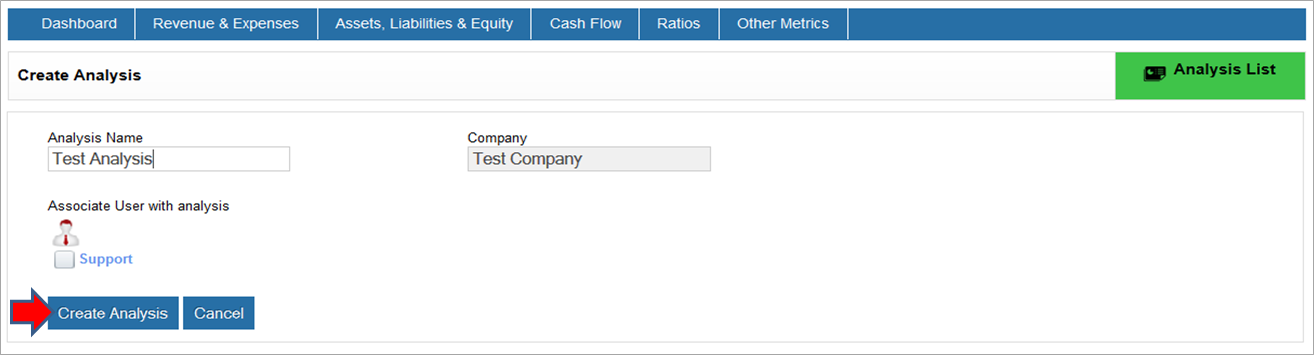
Adding an Analysis
1. Navigate to the “Manage Account” menu in the top right hand corner of the page and selecting the “Analyses” option.

2. This will display the “Analysis List” page, note that it only shows the Analyses that belong to the Selected Company. Next click the “New Analysis” button, to begin the creation process.

3. Next you will be asked to fill out information about the Analysis. Once you’ve filled out the required fields, click the “Create Analysis” button to add the Analysis.
Managing Security/Permissions
Because you may have multiple users or clients within your subscription, understanding how permissions are set is of key importance. By default a newly added user cannot view any data until they’re granted access.
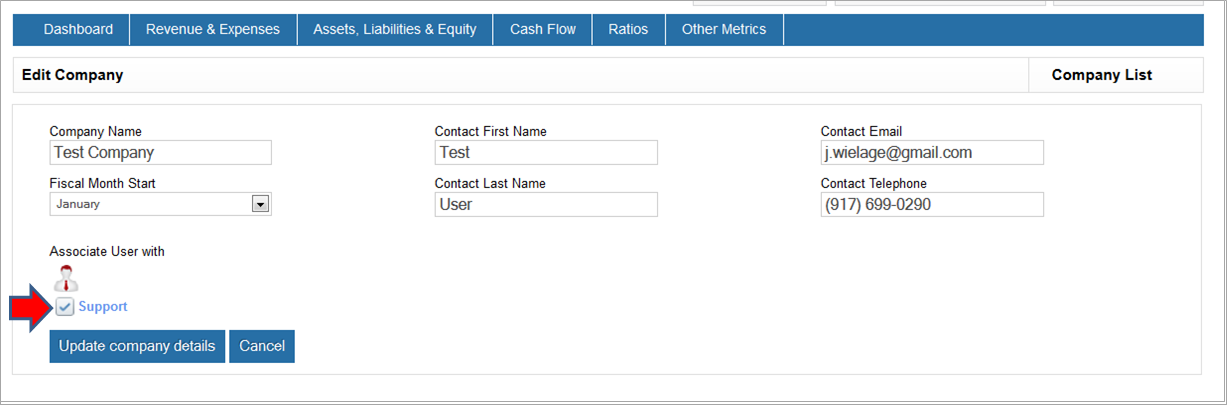
Associating a User with a Company
The first step to granting access is associating a user with a company.
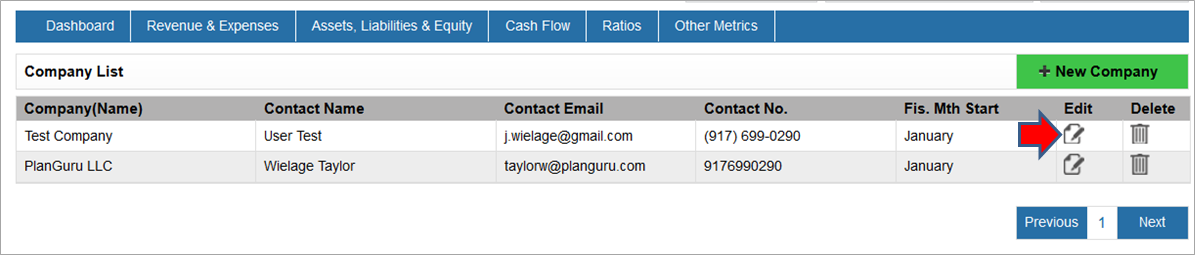
1. Navigate to the “Manage Account” menu and selecting the “Companies” option.

2. Next select the company that you want to grant a user access to by clicking the “Edit”.
3. Associate the user(s) with the selected company by clicking the appropriate check-box. NOTE: Associating the user with a Company doesn’t grant them access to the analyses that belong to it; instead it simply makes them eligible to be given this further permission.
Associating a User with an Analysis
Once a user is associated with a company they can be granted permissions to view an analysis
1. Select the “Analyses” option from the “Manage Account” drop-down. Note that only analyses for the selected company are displayed.

2. Give permissions to an analysis by clicking the “Edit” icon.

3. With the Edit Analysis page open associate the user(s) with the Analysis, by clicking that user’s respective check-box. NOTE: Only users who have been associated with this company will be available for selection within this page.

After being associated with both the Company and Analysis the user will now have access to the Companies and Analyses they've been granted access to.
Billing & Subscription Setup
All fees associated with a subscription are charged to the SAU, consequently as each new user is added an additional $19.95 monthly charge will be added to your PlanGuru Analytics bill.
- If you’re using PlanGuru Analytics for your Company’s internal financial management, billing is very straight forward.
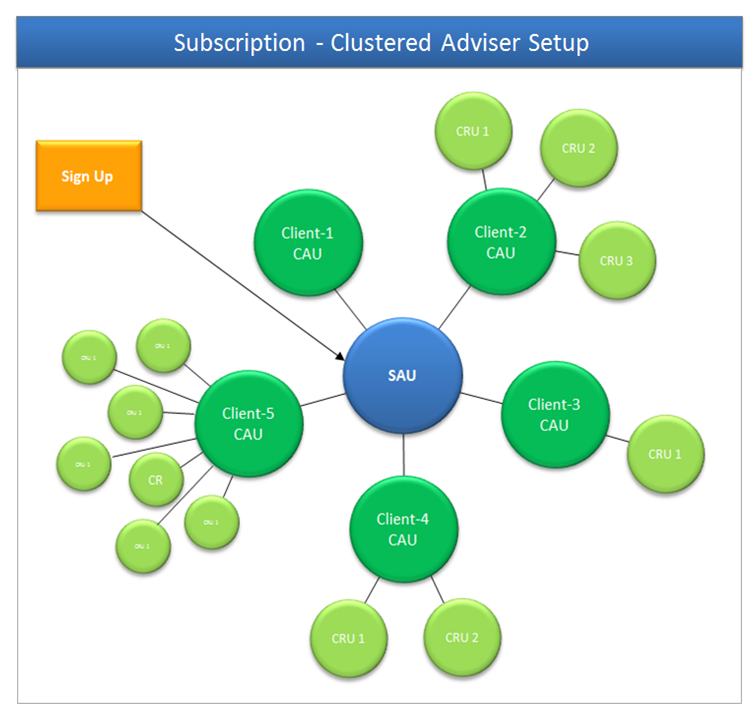
- CPA s and advisers with subscriptions spanning multiple clients can simply bill these charges back as part of their standard billing process. This type of subscription can be thought of a “Clustered Adviser” approach.
- An alternate approach for Advisers is to setup one subscription per client relationship, using this approach each subscription would resemble the Single Company Setup shown above, however your client could be the SAU or they could simply provide you with their billing information. While this may make billing simpler the down side is that you won’t be able to manage all of your clients’ data through a single login.