Company Setup - Account Mask
How to add account numbers to your company in PlanGuru, and properly fill out the correct account mask to meet your needs
Note that the account mask is a company level setting and cannot be changed on an analysis level basis. Once an account mask is created for a company it cannot be changed after the fact. If you need to do so, then you need to set up another company.
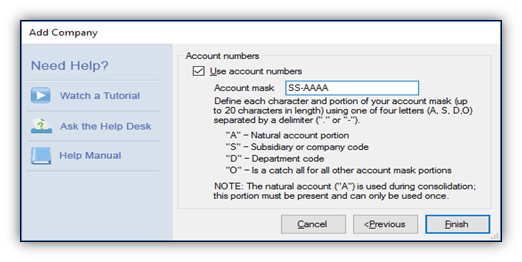
When you choose to create a new company you will be first asked to name the company, define its fiscal year, define the company type, and add the address of the company if you choose to do so. Once you do that and click “Next” the account number options menu will show up. Initially it will only have the blank checkbox next to “Use account numbers”. Checking that will unlock the other options.

The account mask can accommodate up to 20 characters with multiple separators. It will only take A,S,D or O to define the digits, and . or – to define a separator. Of those letters, really the most important is the A portion of the account mas. This is your natural account portion and is the part PlanGuru will use to perform consolidations with. An account mask must have an A portion, and there can only be one section with that designation. The other letters are there more or less for your own organizational purposes and there isn’t really a difference between them. In the example above we have a department code followed by the natural portion, so in PlanGuru an account number under that mask would look something like 02-4000.
